Sunday, June 15, 2014

Going white and some other stuff too


My dream was to live in this house from the movie,  It's Complicated.  Well, I knew that was never going to happen,after all, it was for sale for a whopping $12 million in Santa Barbara.  And, anyways, I liked the movie version so much better.  It was quaint and charming and perfectly imperfect.  It was perfection to me:)


So, 6 months ago, we fell upon our fixer upper that we would make our home.  We were obviously not turning this one into a Spanish farm house. After all, it was a brick and wood exterior. And, that is quite ok, because a Cape Cod is my other fav design type.  After all, I am a VA girl at heart.


Some inspiration for the look we were going after...


Either way, Spanish farmhouse or Cape Cod ranch....we would make the interior a modern farmhouse.

As we were going along, I was really struggling with what color to paint the walls.  I have been obsessed with white walls in contrast with rustic woods.  Does it really get any more perfect than this...


But, for some reason I was a little nervous to go all white, not 100% convinced.  So, we decided on loggia by Sherwin Williams.  It is a super nice neutral and is more of a greige color. Loggia mid-progress below. In addition, my husband was preaching in my ear (that white is so 1990's......little does he know..ha ha:)


I am happy with it.  There are still some days where I wonder if we should have gone all white. We went all white in our guest room below and I just love it (please see below and excuse the fact that it is still not "decorated" and the messy back yard).


So, we moved forward with the greige on the wall and the next question was what to do with the wood ceiling.  Mind you, this was not pretty or authentic beams.  They were you average wood from a 60's ranch.  I knew what I wanted-white.

 But then my hubbie wanted some input on some things :) (This my friends can be dangerous). He wanted to stain it. In his defense, if we had the right artistic painter and stained it a cool gray oak color and roughed it up a bit... then that would have worked out. But we didn't. Long story short we went with the cheaper bid (and incompetent painter-as I mentioned in a previous post) and that got us into some serious trouble. And, the stain did not turn out so well. But, moving on, we brought our beloved more expensive painter back in to fix the mistakes and we agreed this darkness had to be painted white.

So, a before.  This is what we started with in the very beginning.


 This is where we ended up a couple of months ago...way too dark.


And, this is where we are now...a happy place:)It is so much lighter and brighter and definitely the look I wanted in the first place.  Go with your gut, my friends. It has won almost every time!!


Wednesday, June 11, 2014

The powder room

I think powder rooms should be special. After all, everybody has to use the restroom and it is safe to say that the majority of guests in your  home will see it at some point. 

A little inspiration...


So, here is a before....


I knew I wanted a high sink and a wall mounted faucet (even if that meant opening up the wall).   I am in love with the kitchen sink in the Roman and Williams kitchen above. I also toyed with having a console base or having something super unique.  So many options when starting from scratch.  This was also one of the last rooms to do though (so there was not a whole lot left in the budget).

So, my plumber and I got together and came up with this design to make all the dimensions work. This is his drawing as I pretty much draw like a pre-schooler:(


DC Custom Concrete fabricated the sink.  They did all of the concrete work in our house.  They do a fabulous job and are great to work with.

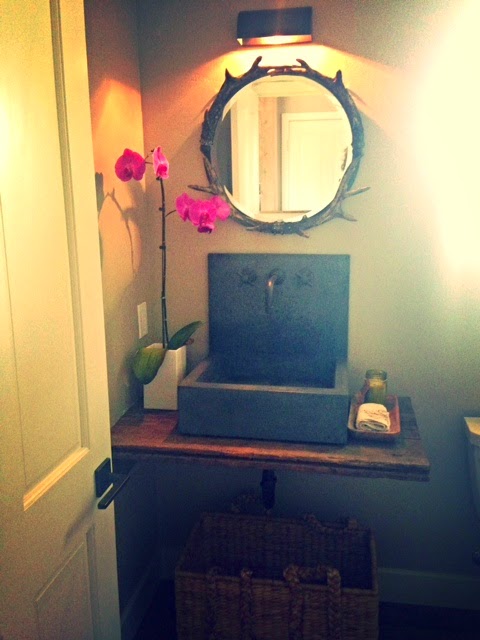
With a high sink, though, it did not leave a huge amount of room for a mirror.  This 25 incher gives you just enough (I think) to see yourself.  Mirror is by Uttermost.

I was definitely limited for the right size light fixture.  With all of the other stuff going on in there...I thought the simpler the better.

A semi-after with bad lighting.


 I was wrong. It was cute but, in the end, did not think it had enough of an impact for a powder room.  So, I switched it out to this one below.  I was going back and forth...should we install wiring for 2 sconces or keep it as is.  The sconces may have been the better option, as there is definitely not enough light in here. Picture moody bar lighting.  But, in the end, we kept the one light because at some point you just have to stop (spending money and opening up the walls)!!

So, here she is now.

 
And, a close-up of the sink.


 And, I love washing my hands in there.  And, I hope my guests will love using this little modern rustic powder room and can see well enough to put their lipstick on:)

xo,
Paige


Tuesday, May 27, 2014

Flipagram

Flipagram.

So, I just discovered this app.  I know I am a little late.  After all, I just jumped on the Instagram bandwagon 7 months or so ago.  I am not super techie.  But, I feel that I have discovered something really huge (I am sure the rest of you felt like that many, many months or years ago:)!

I just love how you are able to put together photos with really great music. We all know music is really special and it can almost always make me cry if it is the right song!!  Anyway, since I just discovered Flipagram, 2 days ago, I am still trying to figure some stuff out and have some questions?

1.)  Can you make the video longer than 30 secs (I do not think so)?

2.) I am thinking Instagram is only programmed for a 15 second video so it is only showing part of my video.  Is there a way around this?

3.) Is there way to fast forward a song, in other words, choose a portion of a song so that it correlates with the video?

4.) Is there an app out there to make longer videos with photos and music?

If anybody knows the answer to these questions...please help this girl out!!

So, here is a quick 30 second video of our house....lots of good before and after pictures.  Wish I could fit many more!!

To see the house video...please click on this link below.

http://flipagram.com/f/CmNO1P49qf#

And, if you have not checked out Flipagram, you are missing out!!  Go make a video!!

xo,
Paige

Friday, May 16, 2014

Kitchen before and after!

We are on a roll over here...I love being able to post afters!!  The kitchen is finido..done..ready for some cooking in and entertaining!!

This is where we started...


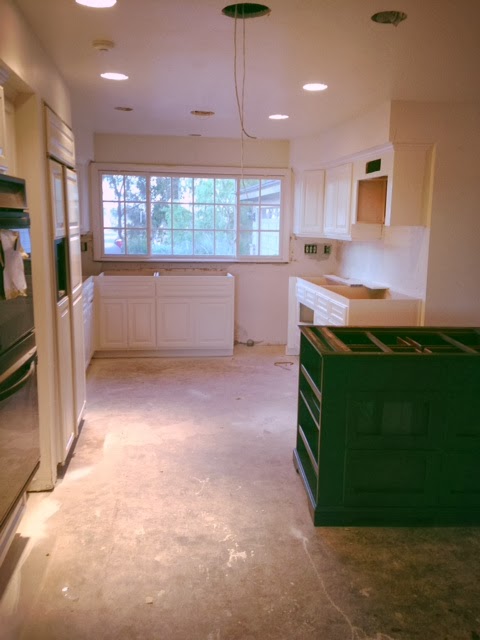
And mid-remodel


And now...


What we did...
 
1.) Painted everything...creamy white for the cabinets, loggia for the walls, and slate for the island as well as the built in cabinets that were already there. (bye bye orange cabinets...we are not going to miss you!!).
 
2.) Installed concrete countertops throughout with a large built in sink (the bigger the better!)
 
3.) Installed gray barn wood for the backsplash and concrete backsplash for behind the stove
 
4.) New appliances except for the fridge (ouch...that was costly!!)
 
5.) Created a breakfast nook with a banquette
 
6.) New lighting (or old lighting that is new to the house)
 
7.) Installed the same hardwood floors as throughout the rest of the house
 
8.) New faucet (love the big industrial faucet and it is so efficient) and hardware (combo of Emtek and Anthropologie)
 
9.) Woven shades
 
One more before and after:


Wednesday, May 14, 2014

The living room..before and after!

I am so excited to finally be able to post some more afters.  I feel that I have been consumed by "befores" on this journey and, frankly, was not sure if I would ever make it to the afters!! So, here we go...

The living room before


  And some progress photos...


And now....the lighting is not so great but wanted to share anyways:)


What we did:
1.) Most importantly, we filled in the sunken/step down living room.  This was by far the most important thing we could have done and the most cost effective. All of the flooring in our home (except for the bedrooms and bathrooms) is reclaimed barn wood by Vintage Timberworks.  It is amazing and beautiful and does not show anything!!  Do you know lovely this is when you have 3 pets:)

2.) Another huge element was turning a large window into a pocket door.  Door is by Kolbe.  This made an incredible difference!!  It was a large investment but so worth it!! We also replaced another door with a slider. And framed both doors in reclaimed barn wood and stained the oak on the inside. The exterior is a slate gray.

3.) Painted all of the walls loggia by Sherwin Williams which is a creamy/beigy/gray.

4.) Stained the wood on the ceilings.  However, I am thinking about taking it to a creamy white and bringing out the raw wood in the beams.  I think this will make it brighter and overall, more appealing. Actually, we will definitely be doing this next week.

5.)Rebuilt the fireplace with stacked stone, a reclaimed mantle, and framed out the large television. Did I mention my hubbie likes televisions.

6.) Placed barn wood on a terribly ugly door that hides the AC unit (you can see it behind the round table).

7.) We put in a pretty serious sound system for blasting music and watching games and movies.

8.) And, filled in the rooms with some of our favorite things...an antique wicker chest, an antique armoire, driftwood lantern by Bobo, antique grain sack chairs (that unfortunately are also our cat's favorite and he is making a mess out of them:( )

What we still need to do:
1.)Paint the ceiling.  My hubbie really wanted to stain it and, while I was pretty set on making it lighter it would have been so hard to go back.  But, after living with it for several months, it really needs to be creamy white. 

2.)Install the perfect arrangement of furniture and accessories.  Still waiting on our pillows, a loveseat, and I need to find a square or circular coffee table.

But, we are so close I can definitely feel it!!

Thanks for checking it out!!

xo,
Paige


Friday, April 25, 2014

The outside is just about done...hallelujah!!

We started this little project in October and let's just say it has taken a little longer than expected to wrap this baby up!! I know this should not come as a surprise but from budgetary over expenditures, sub contractor issues, etc., I could probably write a book on it.  But, overall the process has been fun.  The only real low was when our painter walked out on us and left us with many things to "fix".  Remember, the cheapest bid is not always the one to go with.  We will spend lots of money repairing his mistakes. However, in  the mindset of staying positive, I will focus on the good stuff.  And, our old painter (that was quite a bit more expensive so we did not use him for this project) has come to our rescue and is making magic happen!! Lesson learned.  If you need a good painter in San Diego County..let me know..I will be happy to share his name.

I will get onto the good stuff...some before pictures of this little fixer upper (Isn't she lovely:))


This is a pretty good angle...good thing my husband is a darn good photographer with his iphone
 
 
We painted her "creamy" by Sherwin Williams.  Originally, I wanted to do barn wood shutters but we decided to paint the existing ones. The shutters are painted a slate gray that is a color match to 4 new doors that we ordered from Kolbe doors. 
 
Some in-progress photos....


A little landscaping definitely helps...we went with something a little softer than those hedges.  Lots of succulents, palms, bougainvillea.  I can't wait until the bougainvillea and the vines are going crazy on the house!
 
 
This is the detached garage below.  This walkway leads to our kitchen.  I will show pictures of this little area soon.  Such a great spot to have tea in the morning.  It is still in its non-glory day though..so soon!
 
 
The area I am talking about it right next to this door below.
 
 
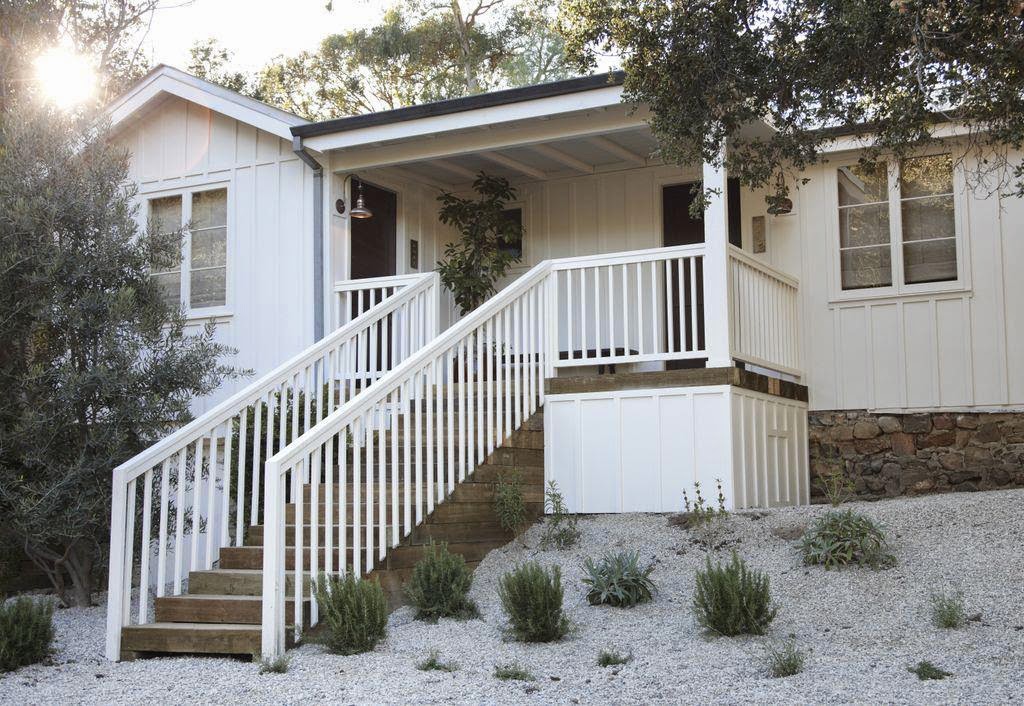
And here is our fixer now....so happy to call her home


Lighting is by Barn Light Electric and Restoration Hardware 


If you have any questions...please ask!
 
Have a wonderful day!!
xo, Paige

Wednesday, April 2, 2014

The pink bathroom-It's not pink anymore!!

Yay..I finally have some pictures to post.  One room in the house is 95% complete! Except for some touch up paint (we moved the electrical today)and some accessories (maybe a vintage wood bench, and shelving for the bottom part of the console,etc.)...we are feeling good about making progress in my son's bathroom.

It was pretty funny before...pink everywhere.  Not only was it pink, but it was scary.  Cabinets falling part, old cracked tub, stained carpet and checkered wallpaper!!!  It was begging for a remodel.

So, here she is in her non-glory days!


It was obviously not hard making this room look better than it's current state:). This is really bad lighting, pics snapped on my phone tonight, but I am pretty excited to finally have a before and after to share.  Grant loves to hear that he has the coolest bathroom in the house.  He even loves his plein air plant on his sink console.  The boy has good taste.
 
 
The console base was made by my brother-in -law. DC Custom Concrete made the top.  They do really great work in San Diego.
 
We kept the tub.  It was a very unique size and would have been nearly impossible to replace.  For $400, it was completely refinished, painted, and sanitized to look as good as new!
 
 
xo, Paige